To create a shell element in the Viewport 3D, start by clicking on the grid or an existing node, then proceed by drawing the surface. Finish by double clicking on the grid or an existing node.
Alternately, you can click on Shells within the Entity Tree. Move to the Data Panel and click on New. Now you can enter in the Nodes fields the sequence of nodes that define the perimeter of the element. You can also name the element by writing it in the Name field.
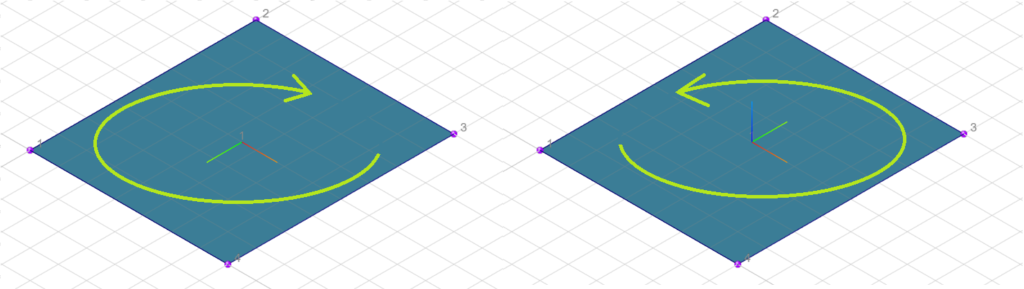
Please note that when you create a two-dimensional element, it is associated with a local reference system with a z axis emerging from the plane. The direction of the axis depends on the direction in which you have joined the nodes.
The mesh will be defined automatically by WeStatiX when you launch the analysis, respecting the parameters you defined in Settings > Meshing