Assign the characteristics, material and section parameters to the structural elements you have created!
Select PROPERTIES on the Tab Bar.
MATERIALS
Select Materials in the Entity Tree, then click New in the Data Panel.
All materials you create will be displayed numbered in the Entity Tree.
DATABASE
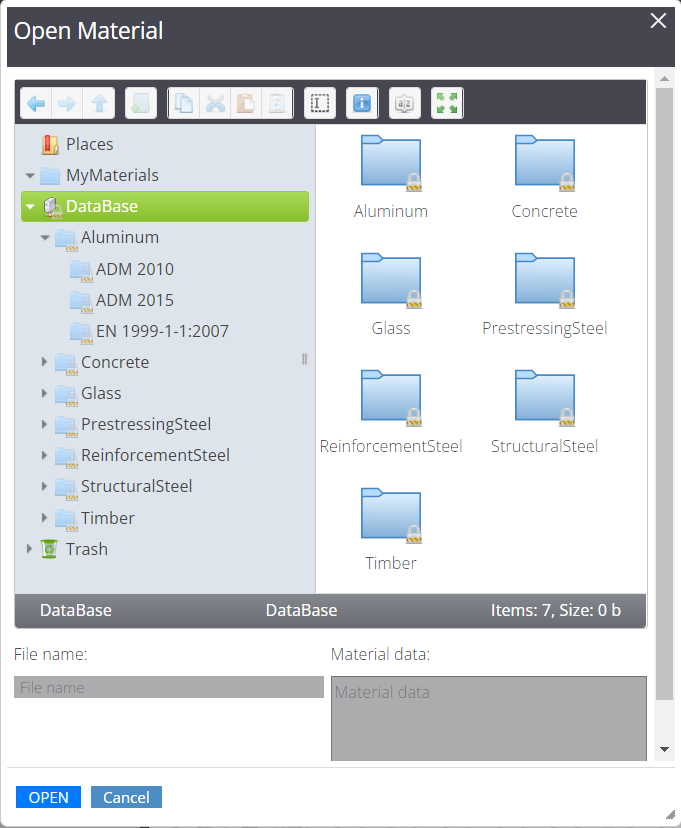
Select Open in the Data panel in order to access the Open Material window.
Next select Database and choose the type of material and the relevant standards. WeStatiX has a library of materials with all mechanical properties in accordance with the main standards (such as EN, ACI, CSA, ASTM, IS).
In the library you will find
- Aluminium
- Concrete
- Glass
- Prestressing steel
- Reinforcement steel
- Structural steel
- Timber
PARAMETRIC
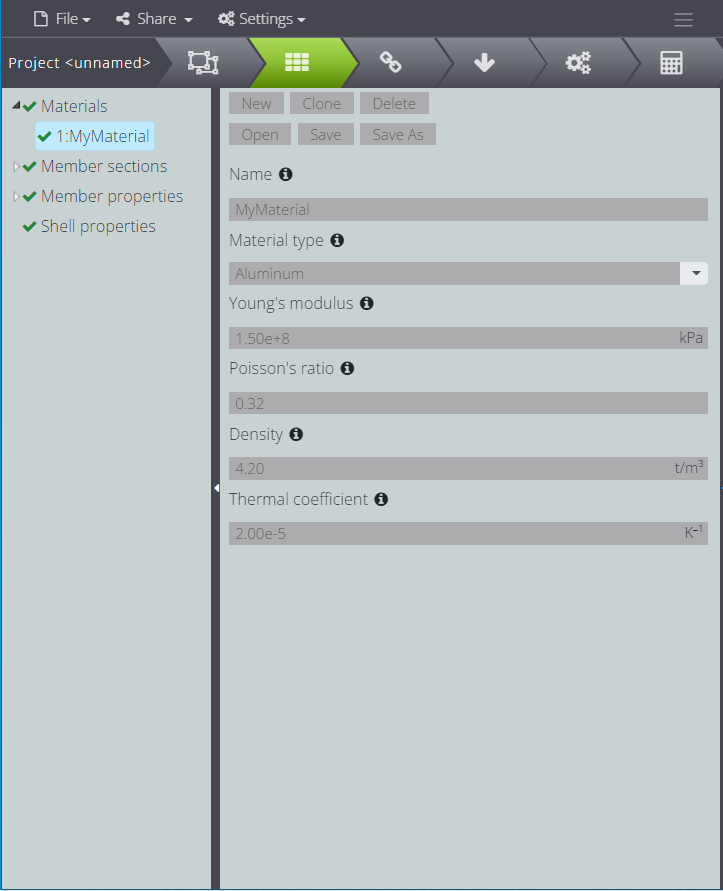
If the material you are looking for is not available in the library, you can create a new one directly in the Data panel.
Fill in the fields assigning the values to the required parameters. If you select this option after choosing the material from the Database, you will find its parameters within the various fields.
Remember to fill in Name, then press Save. The material thus defined will remain saved in your personal library also for your future projects.
My materials
Select Open in the Data panel. If you have already saved some of your custom materials, you can find your private database by furtherly choosing MyMaterials in the Open Material window!
SECTIONS
Generate cross-sections to assign to Members! Select Members sections in the Entity Tree, then press New in the Data Panel.
Generate all the necessary sections for your structure! You will find them numbered in the Entity Tree.
Remember to match the material by filling in the Material field, then choose one of the available types of sections.
database
Select Open in the Data Panel: you can choose the section from the library provided on WeStatiX.
In the new Open Section window under Database, the following section types are at your disposal:
- Rectangular
- Circular
- C-section
- L-section
- I-section
You can select the specified section sub-type and standard by accessing the nested folders. By selecting the desired Database section and clicking again on Open you will get all the parameters that define your section.
custom
WeStatiX allows you to create a section with any shape. Select Custom under the Section type in the Data Panel.
You can create your own section using the Section Editor.
Parametric
If you cannot find the cross-section you are looking for in the WeStatiX database, you can always create a new one.
Select any of the available parametric section types in the Entity Tree.
Click on Section type and choose between the available options in the drop-down menu:
- Generic section
- Rectangular section
- Circular section
- I-section
- T-section
- L-section
- Double L section
- C-section
- Box section
You can specify the geometric parameters of the section in the proposed fields.
In Section Editor or Viewport 3D you can see your section take shape!
If you hit Calculate, WeStatiX will calculate all parameters of the section!
Press Save: the section you just created will be saved in your personal library also for your future projects.
My Sections
If you have already saved sections, you can find them at this location.
Select Open in the Data panel to access the Open Section window.
By entering MySections you will find the sections you saved previously.
You can delete the selected section by pressing Delete.
After you open the saved section, in the fields below you are proposed the main geometric parameters of the section.
To calculate the properties of the calculated section, press Calculate.
MEMBER PROPERTIES
After you have created the materials and cross-sections in the previous steps, you are ready to assign them to the elements that compose your structure.
Select Member properties in the Entity Tree, then press New in the Data Panel.
Assign a name to the property, then list the number of Members you want to apply it to.
Below specify in Section the section you want to associate to the current property, identifying it with its number. You can additionally specify the section rotation in the field Rotation.
Check Cable if your section is of such type and specify its initial tension.
Lastly, with reference to each Member‘s local reference system, select the internal constraints for the start and end nodes.
SHELL PROPERTIES
Select Shell properties in the Entity Tree, then press New in the Data Panel.
Assign a name to the property by filling in the Name field. Then list the Shell elements you want to apply it to. Specify the material and thickness to assign.