The purpose of this example is to show you how to model and execute the design of a reinforced concrete retaining wall: if you want you can find the model among the public projects of WeStatiX.
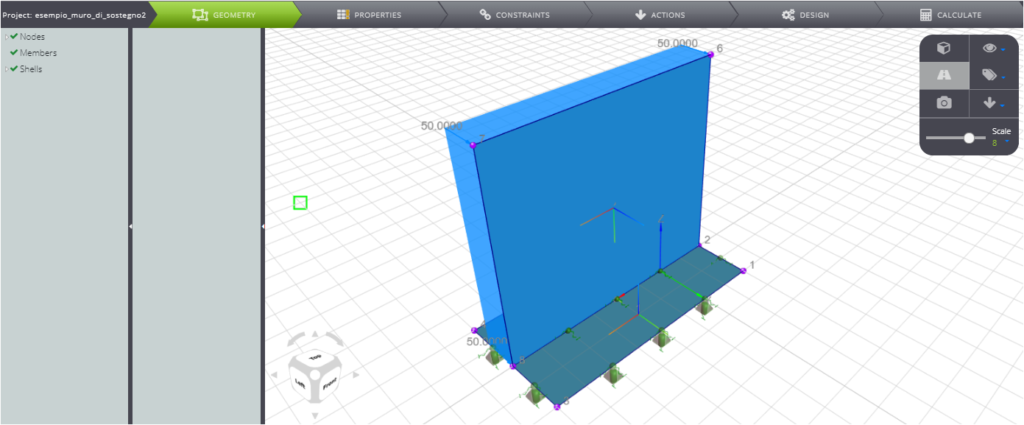
The wall is 7 m high and 6 m wide. The total width of the foundation is 4 m.
Here you can see the model.
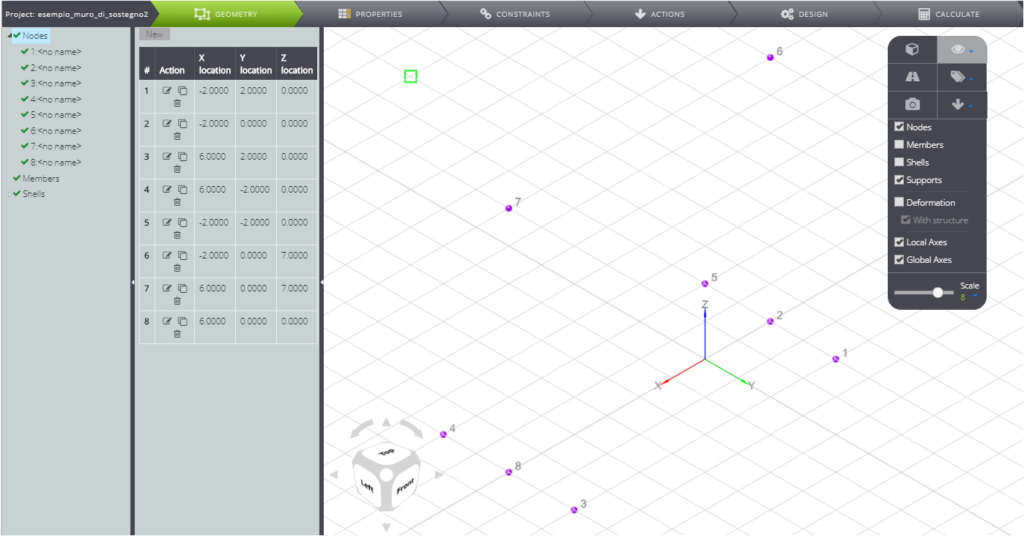
Start by defining the geometry by activating the GEOMETRY tab in the Tab Bar.
Create the nodes with the coordinates shown in the table in the figure.
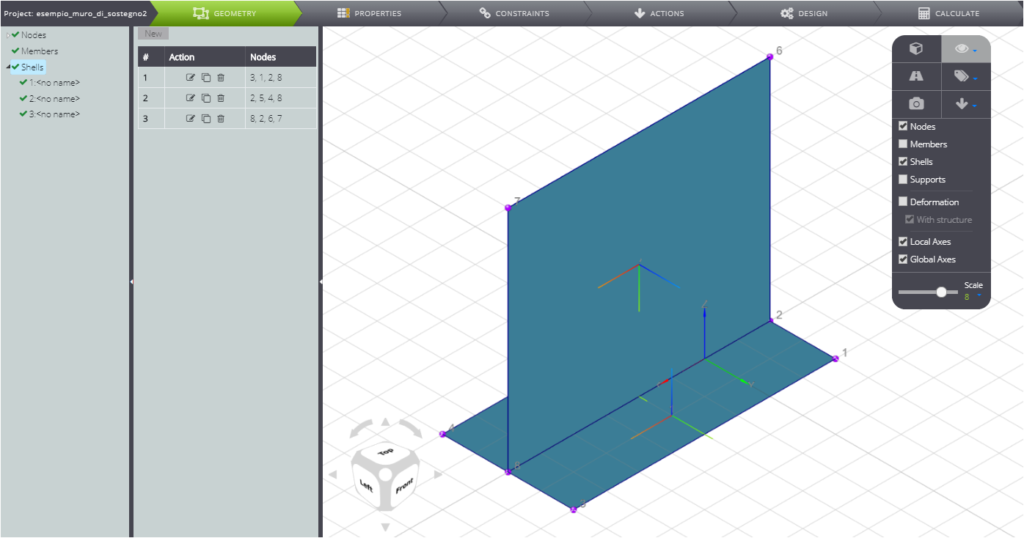
Create shells. Here is your supporting wall!
Once the geometry of the problem is defined, go to PROPERTIES.
Start with materials: click on Materials in the Entity tree.
Create a material for reinforcement steel. It will be useful when you get to the section dedicated to the reinforced concrete project.

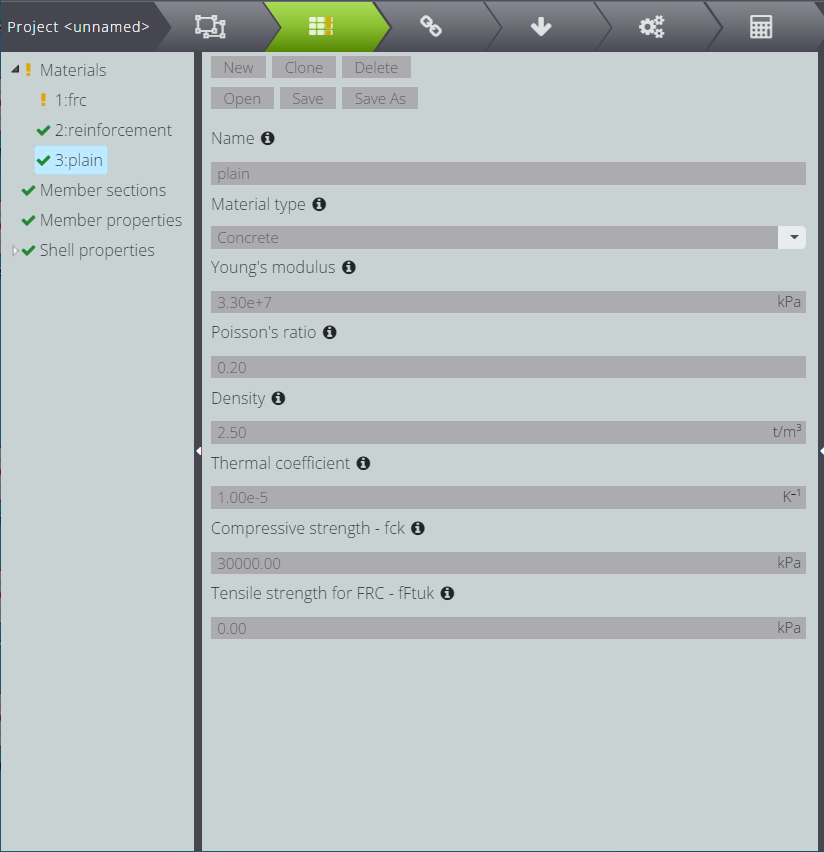
Now enter the properties of the concrete.
Attribute the thickness to the plates (wall and foundations). Press Shell properties and insert
- Shells: the id number of the elements
- Material:the number of the property that corresponds to the concrete
- Thickness: the thickness you want to assign.

Now attribute the boundary conditions.
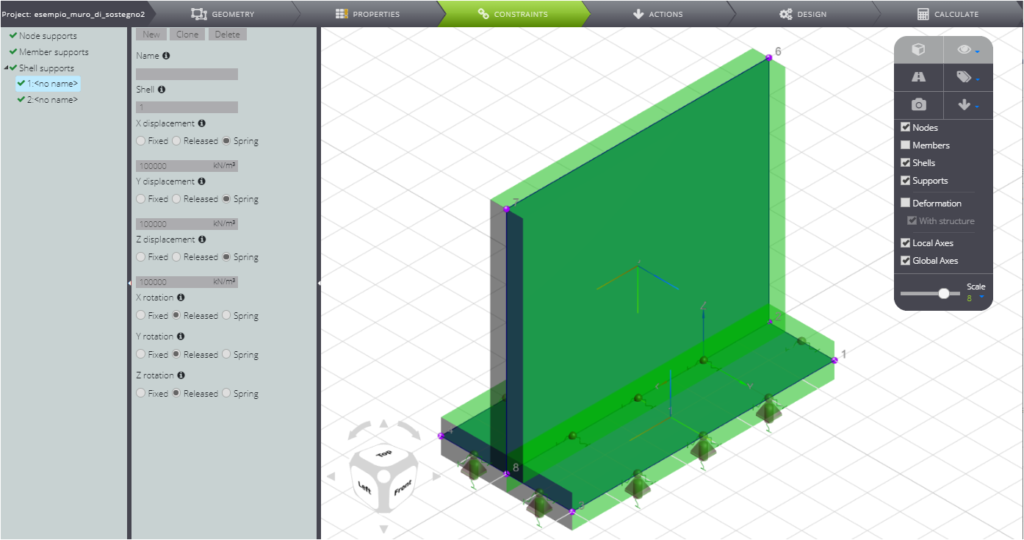
Start by entering the constraints: press CONSTRAINTS and then Shell supports.
You can simulate the Winkler terrain: insert spring-loaded constraints in the three directions with 100’000 kN/m3 stiffness.
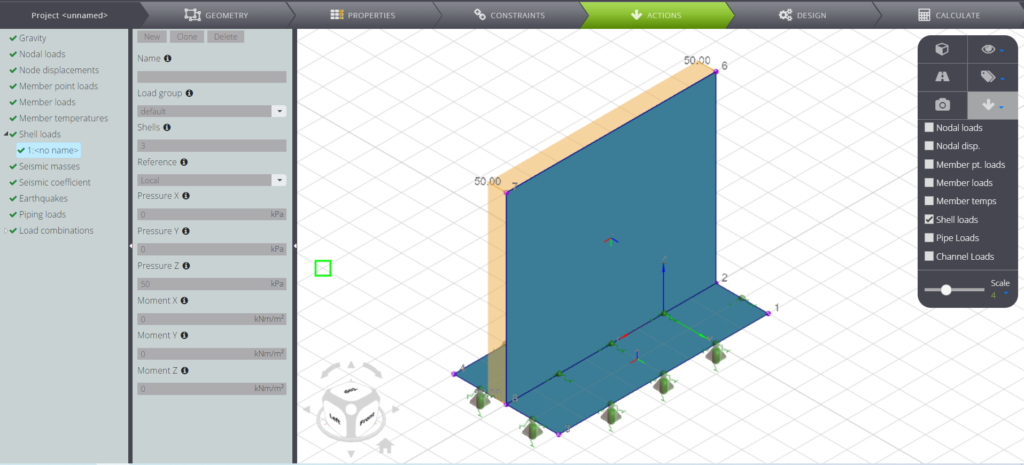
To insert the soil load behind the wall, press ACTIONS.
Apply an evenly distributed load to shell 3: choose the element’s local reference system and fill in the Pressure Z field.
To be able to design the reinforcement, you’ll need to create a load combination, then click on Load combinations and create a new one.
In the current case the only Load group defined is default and is considered a multiplicative coefficient equal to 1.
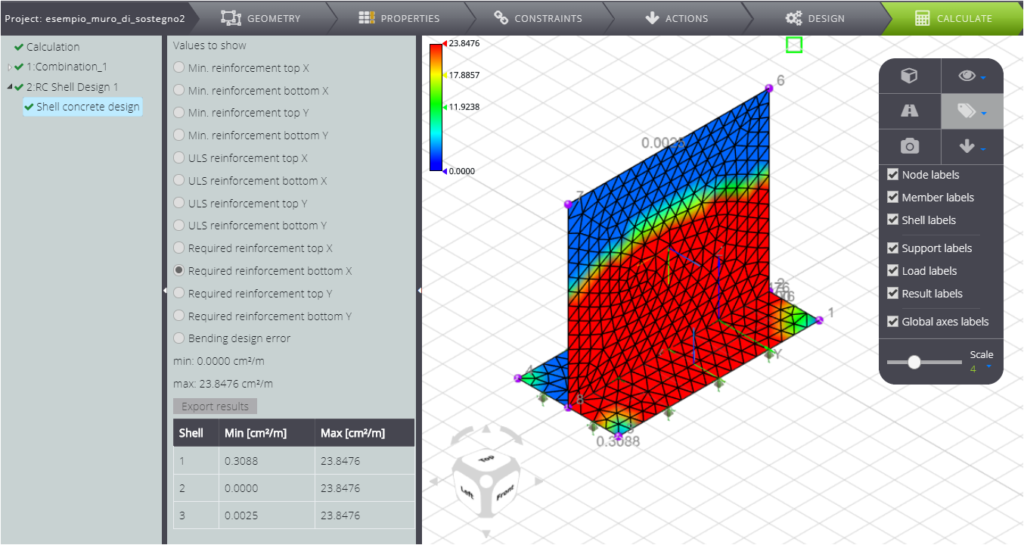
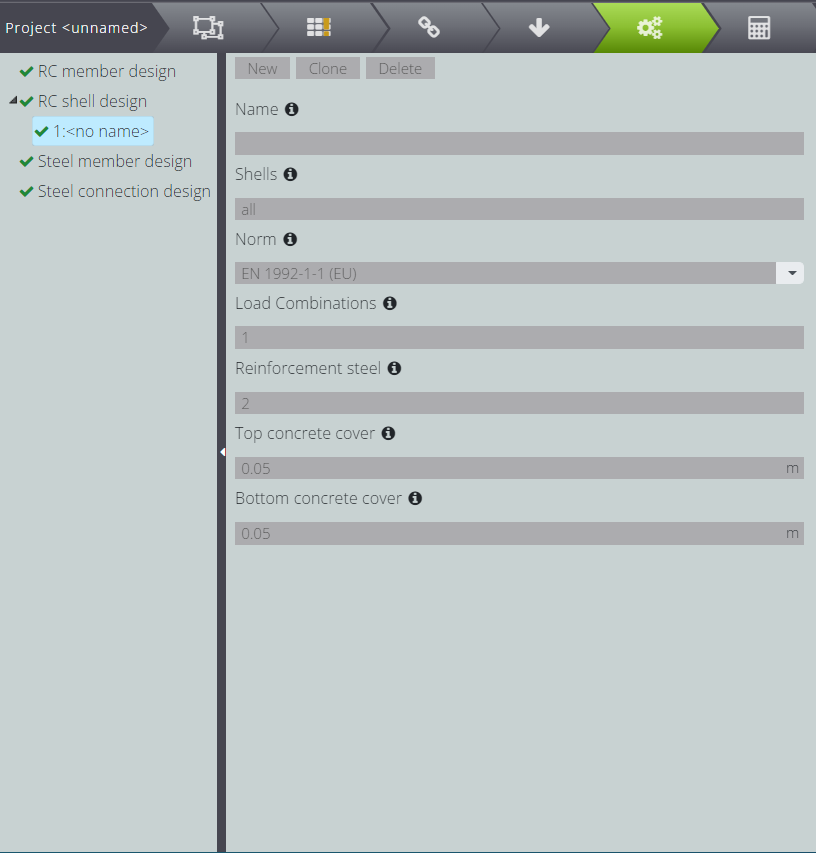
To perform the plate reinforcement calculation, select the DESIGN Tab.
Fill in the fields as shown in the following image.
When you are done, launch the analysis: activate the CALCULATE Tab and press Start calculation.
When the analysis is complete, in the Entity tree you can consult, by clicking on Combination_1: all the results of the static analysis of the model.
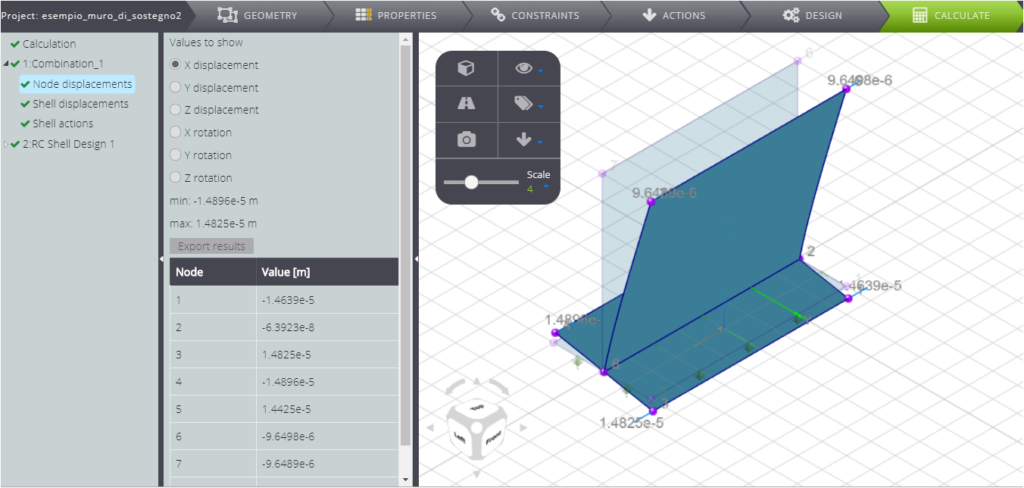
If you press RC Shell Design 1 you can see the results of the reinforcement calculation.